Process-safe layering with coordinated materials
Machine translation
Original article is written in DE language (link to read it).
Summary
Modern ceramic concepts are in trend. Paste and paint colors promise a faster result in the same workflow. Whether these ideas hold what they promise will be examined in this article. In addition to the actual workflow and the light-optical properties, the economic aspect will also be considered.
Introduction
For a long time, the industry has been offering new concepts in the field of ceramic composite materials. These materials promise a significantly faster result than conventional layered ceramics. But is that really the case? Many of these works are posted on social networks, unfortunately, these photos are always taken only with artificial light, the flashes of the cameras. The requirements for composite materials must fit under all lighting conditions. What about the light-optical properties and the cost-benefit analysis?
For many years, dental technicians have dealt with the constant improvements of ceramic materials. With modern layered ceramics, excellent results can be achieved. The light-optical properties of natural teeth are almost perfectly imitated with today's ceramics, even the fluorescent effects. Can liquids and pastes achieve these effects as well? Good reason to take a closer look at them.
Light and Surface
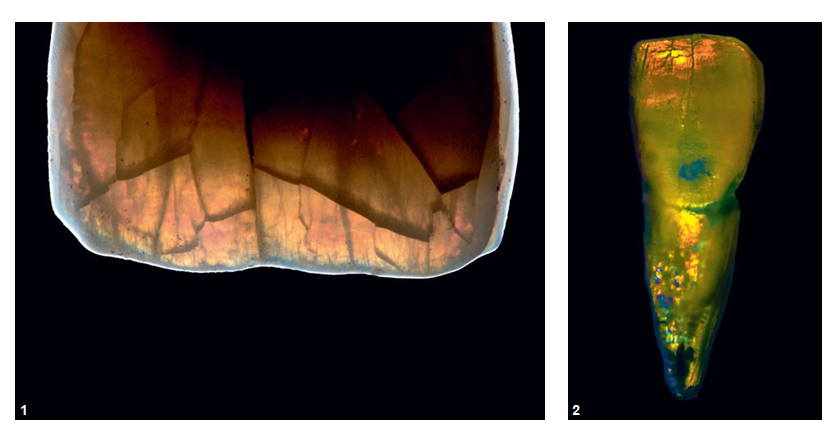
Light and surface texture always play together (Fig. 1 and 2). In the morning, at noon, or in the evening, the light has a different composition, and when we go out at night, artificial light comes into play. The goal must be that the ceramic work appears inconspicuous under all circumstances. Nothing should indicate that it is an artificial replacement.
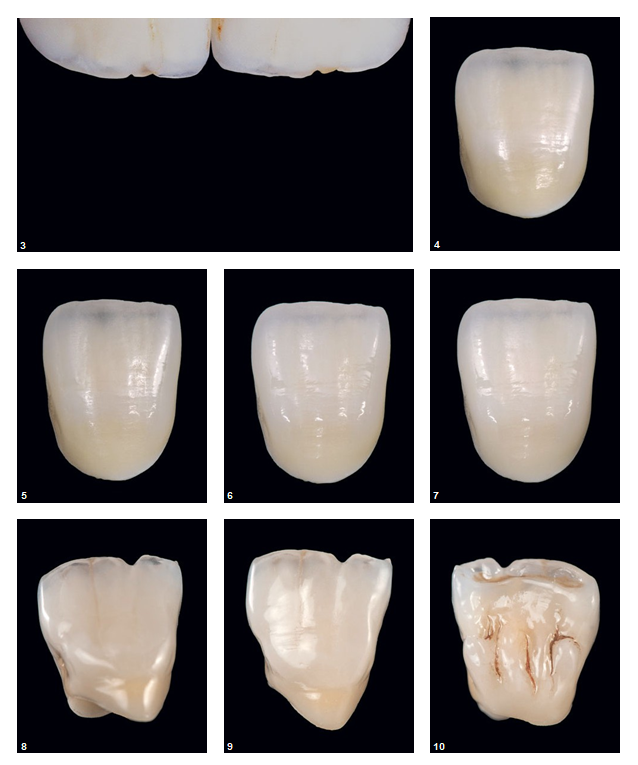
Light is reflected or absorbed, an interplay that results from different angles of incidence on an object and from permeability, translucency (Fig. 3 to 10).
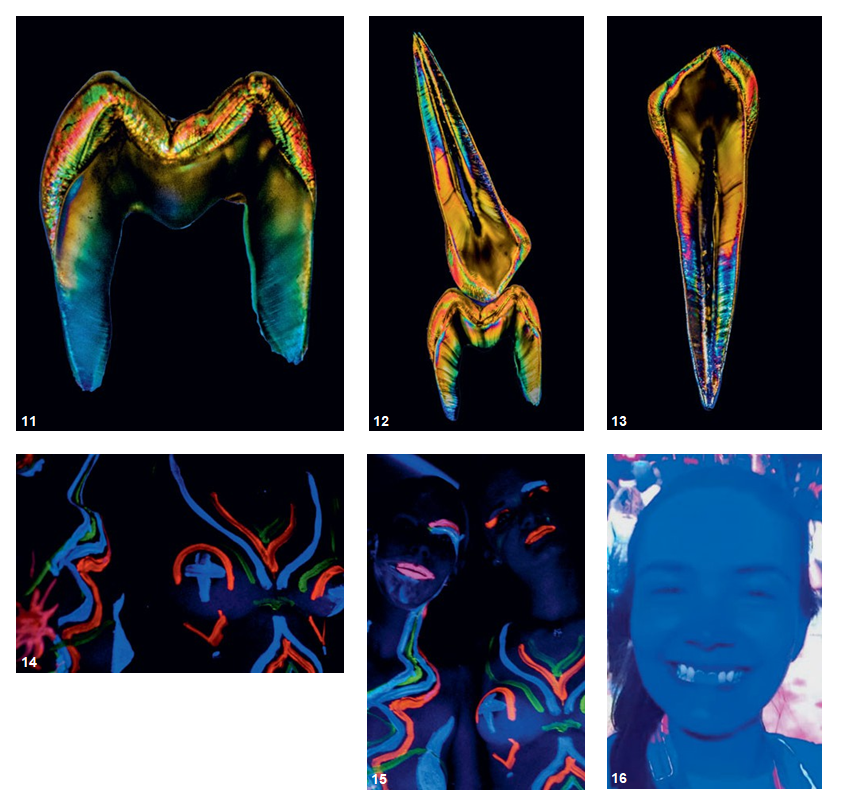
UV light has a peculiarity that is particularly evident under
“black light” (Fig. 11 to 16). Patient photos are preferably taken with lateral flashes and a correct white balance. Digital photography has greatly improved communication between dental practices and laboratories. However, it often becomes apparent that the front tooth crown captured by the camera looks quite good in the photo, but does not appear as nice in natural light. Many parameters must come together to achieve an almost perfect result, not least depending on the technician's shape of the day.
At this point, the digital workflow shows its strengths. The libraries are becoming increasingly extensive and easier to use. It makes sense to create monolithic constructions to paint them. The question arises whether simple painting can achieve effects with natural opalescence, translucency, and fluorescence. The reference is and remains the natural tooth.
With the current luster colors (Fig. 17), different products available on the market are used. For the standard colors A to D, there is no significant difference under UV light. Other colors available in the ranges differ slightly. These differences do not come into play in practice, as intense colors, such as orange or blue, are only used in small amounts.
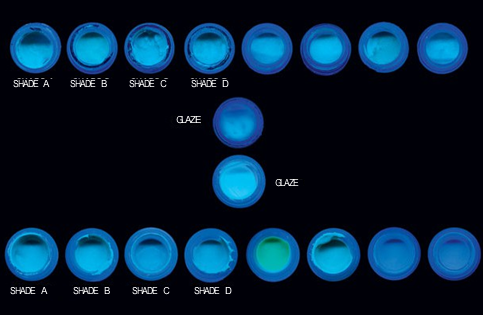
The fluorescence of the base colors is not sufficient to give a monolithic crown a natural appearance. The reason for this is the material itself: If too much is added, the colors become too yellowish-white-opaque (Fig. 18 and 19).
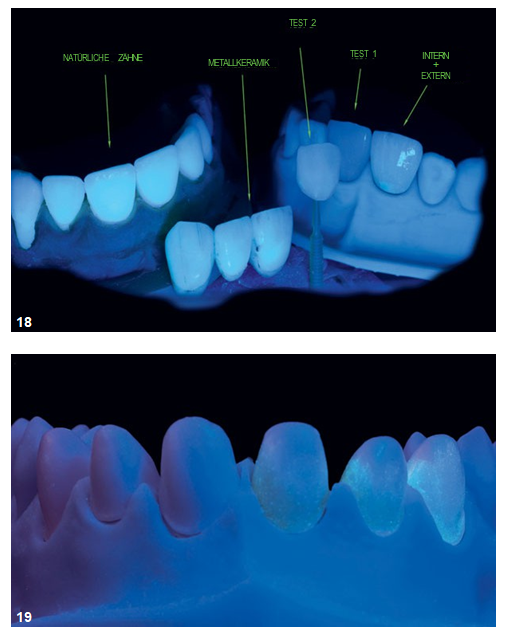
The glaze mass provides a remedy. It has a rather high degree of fluorescence; therefore, it is essential to cover the base colors with glaze mass at the end of the painting process.
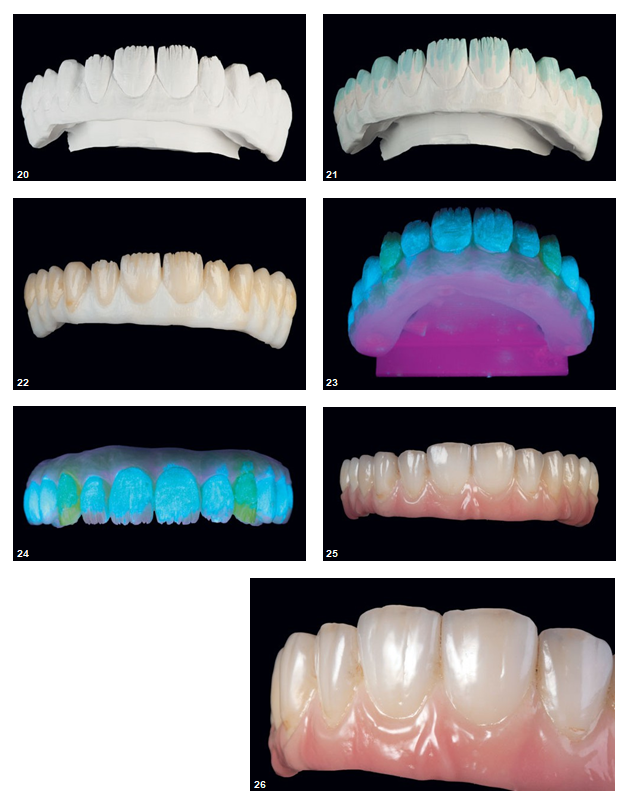
Another topic is the design of the surface texture. It is one of the most important parameters for copying a natural tooth. Those who have taken a course with a trainer from the Osaka Center in Japan know how much work is involved. In the Japanese school, teeth are carved from plaster every day, and their surface is worked to perfection. Implementing all of this in ceramics will not succeed with just one firing. In a natural tooth, the fluorescence comes from within, so these color components should also shine through from the inside of the tooth in dental technical work. It should be considered which materials are truly needed and where they will be used. Presumably, all that is needed is available in every laboratory (Fig. 20 to 26).
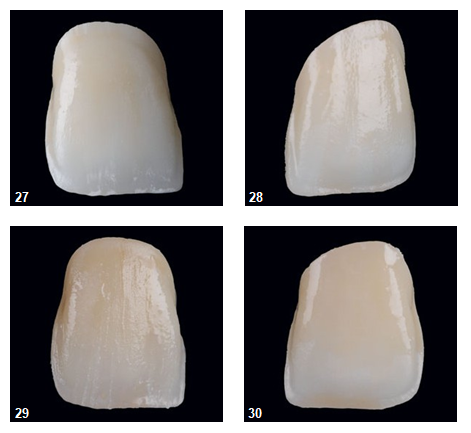
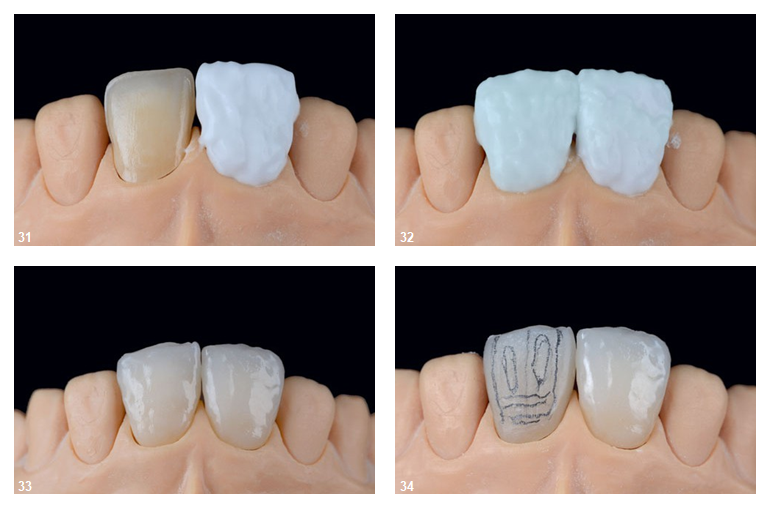
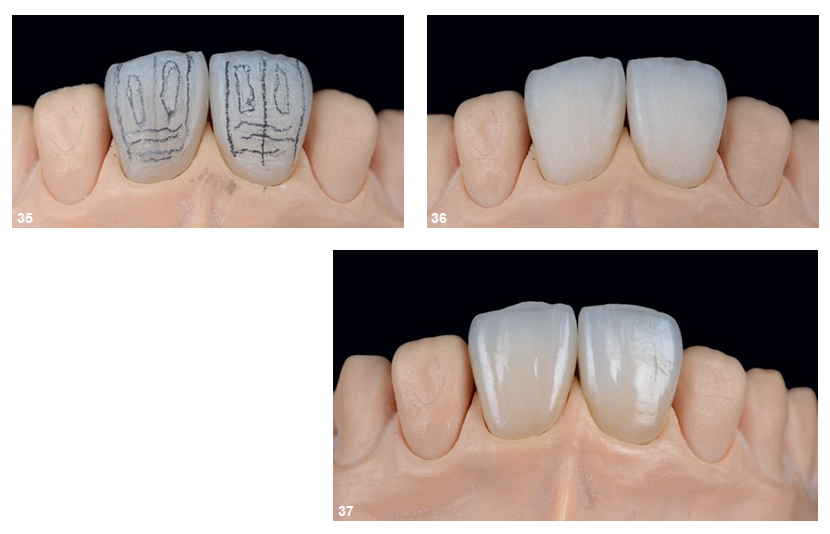
The framework materials are constantly changing, especially zirconia. It all started with a white zirconia, followed by pre-colored discs, and now there are numerous multilayers available. Since there are not many manufacturers of zirconia, these framework materials are all very similar. The coordination of the materials with each other is the key to success. The only question that remains is how much a framework made from a multilayer can and must be reduced to achieve the optical properties and antagonist-friendliness of a natural tooth and to obtain a controllable surface design (Fig. 27 to 37).
Layering
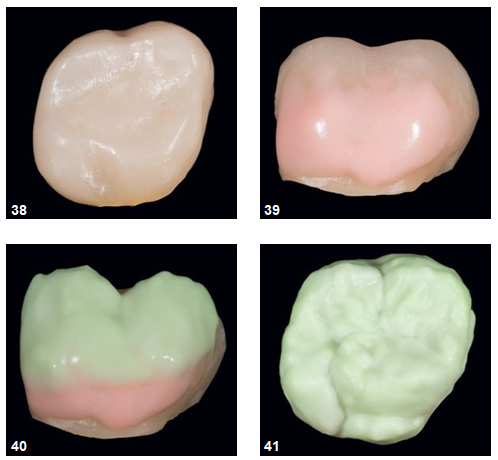
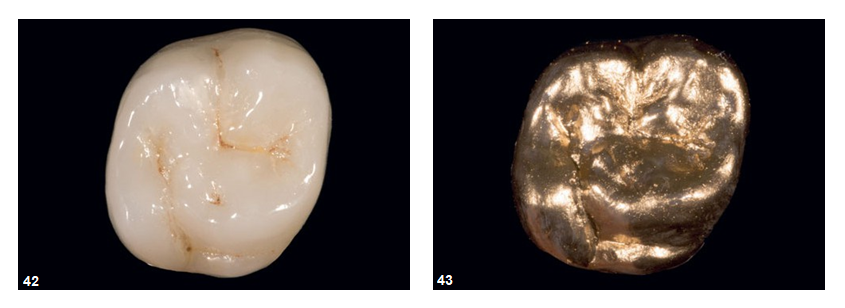
In daily practice, it is useful to develop reproducible workflows. These should be understandable and transferable to every employee. Therefore, it is fundamentally helpful to use as few materials as possible and as many as necessary (Fig. 38 to 43). This also results in a positive economic side effect. A little dentin, some enamel, and translucent materials are needed, along with a color-gradient framework (multilayer) and some fluorescent paint colors.
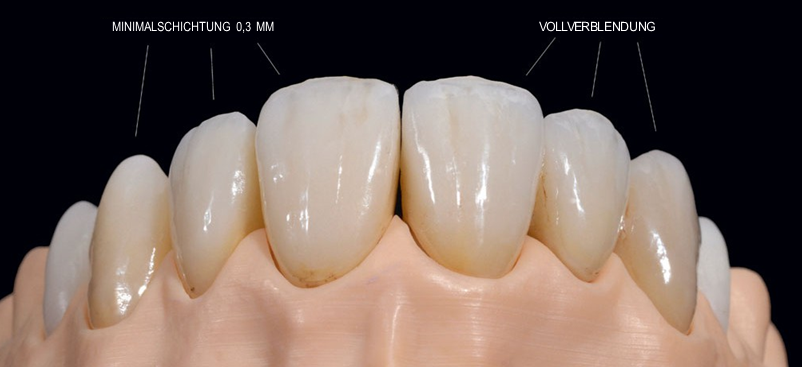
Minor corrections can be made during the glaze firing with a mixture of 80 percent ceramic powder and 20 percent glaze material. It is recommended to mix this mixture with painting liquid; this results in a pasty mass that sinters homogeneously during the glaze firing due to the glaze material content (Fig. 44).
Conclusion
Almost everything needed in the dental laboratory is already in the drawers. Essentially, the combination of all materials is the secret to good work. When these materials are perfectly coordinated, many things become much easier and more reliable in the process.
/social-network-service/media/default/6785/3538f95d.jpeg)